joyeux cuisine

a blog about good food, family, friends, and life.

peanut butter fudge.

This is a little bit about my life right now. I graduated college two weeks ago. I’ve been applying to jobs like a crazy person. Sometimes I forget to leave my apartment. I’ve been watching a lot of Netflix. Yesterday I watched 4 episodes of Ramsey’s Kitchen Nightmares and 6 episodes of Good Eats. I have a problem.
But I now feel like I know exactly what not to do while running a restaurant. So that’s good, right? Maybe that’ll come in handy someday. Yeah, probably not.

Anyway, this recipe is from Alton Brown. I haven’t had much luck making candies before; I just can’t get peanut brittle right. But this fudge recipe was actually pretty foolproof. And you all know that I love peanut butter (luckily, so does my boyfriend). Plus I’m driving to Michigan to spend the weekend with my boyfriend’s family and fudge is a great ice-breaker. At least, I hope so.
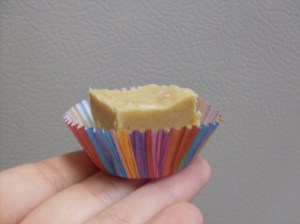
This fudge is really easy to make. There’s no stove involved, just a microwave. Which isn’t actually the best way to make fudge, but if Alton can do it we can do it too. This is also a sharing recipe. Don’t eat it all yourself. I mean, you can if you want, but I suggest sharing. You’ll make friends that way.

Make some fudge. Download the new She and Him album. Dance around your kitchen. It’s allowed.

Peanut Butter Fudge
recipe by Alton Brown
makes 1 8×8 pan of fudge

1 cup (2 sticks) unsalted butter, plus more for the pan
1 cup creamy peanut butter
1 teaspoon vanilla
1 pound (about 3 and 1/2 cups) powdered sugar, sifted

Butter an 8×8 pan. Cover the pan with parchment paper or wax paper and set aside.
Place butter and peanut butter in a large microwave safe bowl. Cover with plastic wrap and cut slits in the plastic wrap to let the steam escape. Microwave on high for 2 minutes. Remove from microwave and stir gently. Place back in the microwave and heat for 2 more minutes on high.
When the 2 minutes are up, remove the plastic wrap and stir in the vanilla and powdered sugar with a wooden spoon. The fudge will get really thick so you may need to switch to a potato masher to combine everything. When the powdered sugar disappears, scoop into the prepared pan and smooth out with a non-stick spatula. Cover the top of the fudge with more wax paper or parchment and refrigerate until firm, about 2 hours.
When the fudge is firm, cut it into 1-inch pieces. Store in the refrigerator.

Leave a comment »

peanut butter pancakes for one.

You don’t need me to tell you that peanut butter and pancakes are one delicious combination. You probably also don’t need me to tell you that after sleeping for 10 hours all you need is pancakes. You really don’t need me to tell you that when the only thing you have to do is pack up your apartment the last thing you want to do is pack. I think we’ve all been there.

These pancakes were inspired by Joy the Baker and her Peanut Butter Bacon Pancakes. I still don’t know how I feel about the bacon part. But peanut butter is my jam. I also threw some chocolate chips on the warm pancakes and let them melt. Perfect.

Pancakes are sometimes made for sharing. But these aren’t. These are all for you. All of ’em. You have permission not to share. Unless you really want to and you really love the person you’re sharing with. It’s okay to be selfish sometimes.

Sleep in. Make some pancakes. Smother them in maple syrup. Then start your day and enjoy the sunshine.

Peanut Butter Pancakes
makes 4 small pancakes

1/2 cup flour
1/2 teaspoon baking soda
1/2 teaspoon baking powder
1/2 teaspoon salt1/2 cup buttermilk
1 egg
1 and 1/2 teaspoons canola oil
1 spoonful of peanut butter

In a small bowl combine the flour, baking soda, baking powder, and salt. In a separate slightly larger bowl whisk the buttermilk, egg, oil, and peanut butter together. Add the dry ingredients to the wet and whisk until most of the lumps are gone. Let sit for a few minutes.
Heat a griddle over medium heat. Grease griddle with butter or nonstick spray. Using a 1/4 cups measuring cup, pour batter onto the hot griddle. Cook for 2-3 minutes on the first side and then flip onto the second side. Cook until the pancake releases from the griddle and is golden brown. Repeat for all the pancakes.
Serve warm topped with chocolate chips (optional) and maple syrup (also optional).

Leave a comment »

peanut butter cupcakes

Woah guys! This is my 50th blog post!! That is crazy to me. A lot of things have happened in the last 50 posts. I (in no particular order) started my senior year of college, made some new friends, turned 22, got discouraged, was encouraged, watched a lot of movies, got a boyfriend, did a lot of homework,signed a lease on an apartment, and had a senior recital. I mean, that’s only a few things of the hundreds of things that have happened. I’m really thankful for everything that’s happened this year because it’s been a really great learning experience.

In honor of this 50th post I’m going back to the beginning; peanut butter and chocolate. The first recipe I shared with you guys so many months ago was Batter Up Brownies. Peanut butter brownies with chocolate chips. Still one of my favorite recipes in the world. But really anything with peanut butter and chocolate is good. Therefore: cupcakes!

20130407-161438.jpg

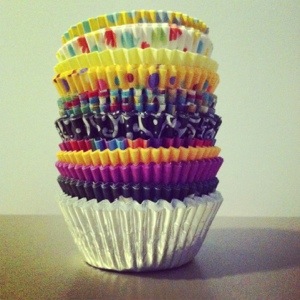
I have more cupcake liners than any one person should have. But that’s okay. I’m always ready to make cupcakes. These cupcakes have been in the making for a long time. Plus, I haven’t really baked a lot recently and I think it’s affecting my homework. I don’t know for sure if there’s a correlation there, but I’m just gonna go with it.

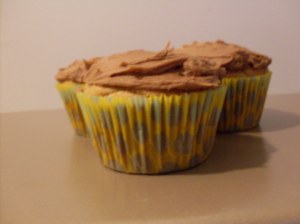
These cupcakes are really delicious. The inside is really moist but the cake is really dense. That pairs really well with the chocolate buttercream frosting. I could have done with a little stronger peanut butter flavor, but it was still pretty freaking good. And I won’t judge you if you throw some chocolate chips into some of the batter. In fact, I would encourage it. It obviously can’t hurt them!

Make some cupcakes, share cupcakes with someone you really like, watch some Doctor Who, enjoy the weather (no matter what it may be).

Peanut Butter Cupcakes
makes 18 cupcakes
adapted slightly from Taste of Home

1/3 cup butter, softened
1/2 cup creamy peanut butter
1 and 1/4 cups packed brown sugar
1 egg
1 teaspoon vanilla extract
2 cups flour
1/2 teaspoon salt
1/2 teaspoon baking powder
1/2 teaspoon baking soda
3/4 cup milk

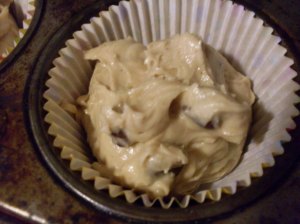
Preheat the oven to 350 degrees. Line one cupcake pan plus half of another pan with paper liners and set aside. In the bowl of a stand mixer fitted with the paddle attachment cream together butter, peanut butter, and sugar until fluffy (about 2 minutes). Add the egg and vanilla and beat well. In a separate bowl combine the dry ingredients and whisk together. Add half of the dry mixture to the butter mixture. Beat well. Add half of the milk to the butter mixture and beat. Add the rest of the dry mixture and beat until combined. Add the rest of the milk and beat until the batter is smooth. Fill cupcake liners 2/3 of the way full and bake for 18-20 minutes or until a cake tester inserted into the center comes out mostly clean.
Frost with desired frosting and eat.
Store in an airtight container for up to a week.

Chocolate Buttercream Frosting
frosts 24 cupcakes

3/4 cup butter, room temperature
2 Tablespoons cocoa powder
2 cups powdered sugar
1 teaspoon vanilla extract
2 Tablespoons milk

In the bowl of a stand mixer fitted with the paddle attachment beat butter until smooth. In a separate bowl sift together the powdered sugar and cocoa powder. Add to the butter and mix on low until combined. Add vanilla and milk and beat on medium speed until the frosting is light and fluffy.
Store any leftovers in the fridge.

3 Comments »

peanut butter chunk ice cream.

There’s one person in everyone’s life that is there to challenge you and test your patience. I’m struggling with that person right now. You know what I decided to do? Rise above it. I refuse to play the games and fall into the same attitude as them. Rise above the lies that person is spreading about me and continue being myself. I won’t let you win. Alright…rant over. Sorry for that. Just needed to get it off my chest…it’s been a long day.

Let’s talk about ice cream. I just got an ice cream maker last week. I’ve been wanting one for a long time but those puppies are expensive. Holding out paid off though because I got a Cuisnart one for $15 (thank you Kohl’s cash!). That is how a college student shops.

I decided my first homemade ice cream would be the peanut butter cup recipe that came with the ice cream maker. All things that I love; peanut butter, chocolate, ice cream. Excellent. Maybe because it’s my first batch of ice cream or maybe it’s because it’s homemade but it didn’t quite turn out like I wanted it to. I do believe it’s a good recipe, maybe I just need more practice.

(Tomorrow I’m making dairy and egg free cupcakes. I’ve got a bake-off to win.)
(Also, here’s a picture of my cat. Because I can.)

Make some ice cream. Let the haters hate. Be yourself.

Peanut Butter Chuck Ice Cream

from the Cuisnart recipe book

makes about 6 cups

1 cup peanut butter (not natural)

2/3 cup granulated sugar

1 cup whole milk

2 cups heavy cream

1 teaspoon vanilla extract

1 cup chopped peanut butter cups (I got a bag of minis and cut them in half)

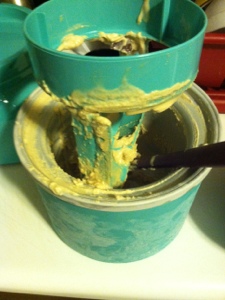
In a medium mixing bowl cream peanut butter and sugar together with an electric mixer until smooth. Add the milk and mix on low. Stir in the heavy cream and vanilla. Chill in the fridge for at least 2 hours. After the chill time plug in your ice cream maker and according to the directions for your ice cream maker** pour the mixture into the bowl and churn until the soft consistency is reached. My recipe said it would take 20-30 minutes, but it only took about 15. Five minutes before the ice cream is done add the chopped peanut butter cups and let them mix thoroughly. If you want a firmer ice cream place in an air tight container and freeze longer.

**My ice cream maker is one where the bowl where the ice cream goes is a double layered bowl that you freeze for about 18 hours before use. That means you don’t need rock salt or whatever else you need for some other things. So follow the directions that you know about your ice cream maker. :)

Leave a comment »

(not your usual) monster cookies.

Some thoughts about my first day of senior year:
Being on stage for the entirety of the first chapel of the year is cool….wait, Dr. B is making seniors stand up? Alright then…
Why the heck did I wait so long to take General Biology?!
Flat major three? Sus-4? These aren’t real things…right?
I need to go practice.
Where did all these freshmen come from?
I need to eat a bunch of cookies right now.

As you can see by the above statements and questions I am a crazy person. But that’s okay. Cookies usually make these thoughts better.

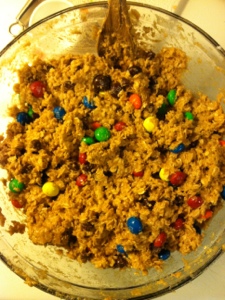
20120830-073742.jpg

I have some very fond memories of monster cookies from my childhood. My dad is a band director and every year at the end of marching season my mom would make cookies for the whole band. She has a recipe for about 100 cookies and mixes everything in this plastic tub because it can’t fit in a mixer. One year, a really long time ago, one guy did the chicken dance for one of their marching shows so my mom made him the biggest cookie. It was almost the size of one of those cookie pizzas, and he got the entire thing all to himself! So lucky.

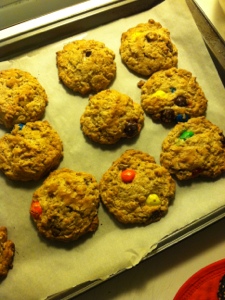
20120830-073822.jpg

I didn’t use my mom’s recipe for this (mostly because it was going to require math and I don’t do math past 8:00 at night) but I found one online that is super delicious. And there is no flour in it! Crazy!

One thing I did differently: use peanut butter M&Ms. Guys. Seriously. This is UH-mazing. My friend Bethany and I discovered this one day because peanut butter M&Ms were on sale so we got a bag of those and made monster cookies. So dang good.

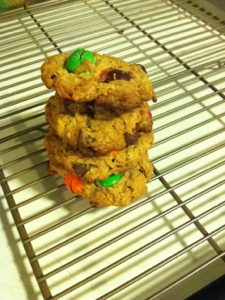
20120830-073845.jpg

So make some cookies. Enjoy your day. Try and be nice to people.

Monster Cookies

adapted from Recipe Girl

makes about 4 and 1/2 dozen cookies

1 and 1/2 cups creamy peanut butter

1 cup brown sugar, packed

1 cup white sugar

1/2 cup (1 stick) unsalted butter, softened

3 large eggs

1 Tablespoon vanilla extract

2 teaspoons baking soda

4 and 1/2 cups quick cooking oats

1/2 to 1 cup milk chocolate chips

1 cup (give or take a handful) peanut butter M&Ms

Preheat the oven to 350 degrees. Line 2 cookie sheets with parchment paper. In a large bowl cream together peanut butter, butter, and sugars with an electric mixer until smooth and creamy. Add eggs one at a time beating well between each addition. Add the vanilla and beat again. Mix in the baking soda. With a spatula mix in the oats until evenly distributed. Fold in the chocolate chips and M&Ms. Use a large cookie scoop to heap onto the cookie sheets. Bake for about 9-11 minutes or until the edges are barely golden brown. Remove from oven and cool on a wire rack. Store in an airtight container.

These cookies will last 3-4 days stored at room temperature.

Leave a comment »

peanut butter oatmeal cookies.

I’m the type of person that will leave a little extra cookie dough in the bowl when I’m done making them just to eat it. Not the small amount normal people leave in after scraping down the sides. I will intentionally leave enough dough for at least one cookie on the spatula so I can eat it. There’s the whole salmonella thing, but I’m not all that worried about it. There are, however, only certain kinds of cookie dough I do this with. Chocolate chip cookies, white chocolate chip macadamia nut cookies, s’mores cookies, moose tracks cookies (don’t worry, I’ll share that recipe later), and oatmeal cookies. Especially when they involve peanut butter.

I have some friends going on a family vacation and I wanted to make them a little snack to take along. My mom always used to make chocolate chip oatmeal cookies when we went on vacation so there was a little bit of inspiration. We’d always do a double batch and share them with all our family. It was awesome. These aren’t quite those cookies, but they’re still super delicious. I’m also trying to make some healthier things, and I don’t know if this counts or not, but oatmeal is good for you so I say it does. I’ll learn to make healthy things someday…maybe.

Peanut butter is one of my most favorite things. Cookies are also pretty high up there as well. Right under my cat and music. I’ve always said: if you like cookies, we’ll get along just fine.

Oh, I added some chocolate chips to the last bit of batter before I baked them. Yeah, it was still delicious. They aren’t totally necessary though. There is a lot of sweet going on in these, but there’s a kick of cinnamon that adds are really rich depth to the cookies. If you don’t put cinnamon in cookies you need to start. Like, now. Please?

These are good cookies for sharing. Just keep that in mind. You’ll make a lot of friends.

Peanut Butter Oatmeal Cookies

adapted from Pillsbury

makes 2 1/2 dozen cookies

1 cup packed light brown sugar

1/2 cup (1 stick) unsalted butter, softened

1/2 cup peanut butter

1 large egg

1 teaspoon vanilla

3/4 cup flour

1/2 teaspoon baking soda

1/2 teaspoon salt

1/4 teaspoon cinnamon

1/4 teaspoon baking powder

1 cup old-fashioned oats

Preheat oven to 350 degrees. Line 2 cookies sheets with parchment paper and set aside. Whisk together flour, baking soda, salt, cinnamon, and baking powder and set aside. In a large bowl with an electric mixer cream together brown sugar and butter until smooth and creamy. Add in egg, vanilla, and peanut butter. Beat until well combined. Add half the dry ingredients and beat. Scrape down the sides of the bowl and add the remaining dry ingredients. Mix until everything is incorporated. Fold the oats in with a spatula. The dough will be a little bit wet and sticky, but it’s okay. That means they’ll spread well in the oven. Drop onto lined baking sheets and bake for 7-9 minutes or until the edges are slightly golden brown. Cool on the baking sheet until they’re set enough to move to a cooling rack. Serve warm or at room temperature.

These cookies will keep in an airtight container at room temperature for up to a week.

Leave a comment »

peanut butter chocolate chip cookies

This weekend two of the most awesome people I know got married and I’m so glad that I got to be in attendance. It was a really big party for friends to get back together and celebrate marriage and life. Those two are great and they truly belong together. The wedding took place in Indiana and my brothers and I went over a couple days early. That means we’ve been eating out for about 3 days straight. This is not a good thing for anyone. I also didn’t get to bake for a little while. So I was itching to do some baking when we got back.

This led to searching through cookbooks and around the internet to find a good recipe. I was totally craving peanut butter and chocolate (it’s a weakness), and I found this recipe stuffed into one of my cookbooks. Similar to my brownies from a few posts back, but still different enough to be delicious.

Peanut butter chocolate chip cookies. Those words in the same sentence are excellent. This recipe has no flour in it. I think that’s a good thing. Maybe a little healthier? Yeah…I’m just gonna go with it. We start with peanut butter, white sugar, and brown sugar. This little trio of deliciousness gets whipped up nice and fluffy. Then all the other ingredients get tossed in and mixed together. It’s really simple and really worth it. It’s one of those one bowl recipes and I love how classic this is. Someday I’ll learn to branch out and make other kinds of cookies. Someday…

These cookies are really good with a glass of milk. Dipping is optional but highly encouraged. I have this thing about underbaking cookies…I do it all the time. There’s just something about a really chewy cookie that you have to love. There’s positives about crunchy cookies too, but chewy cookies are the way to go. In my humble opinion anyway.

Bake these cookies. And then go to sleep. It’s just the right thing to do.

Peanut Butter Chocolate Chip Cookies

makes 2 dozen cookies

1 cup peanut butter

1/2 cup white sugar

1/2 cup brown sugar

1 egg

1 teaspoon vanilla

pinch of salt

1 teaspoon baking soda

3/4 cup chocolate chips (milk or semisweet)

Preheat the oven to 350 degrees. In a medium sized bowl combine peanut butter and sugars and mix with an electric hand mixer until fluffy. Add in egg and vanilla and mix until combined. Stir in the salt, baking soda, and finally the chocolate chips. Roll into walnut sized balls and place on a cookie sheet lined with parchment paper. Smash down with a fork and create the criss-cross design. Sprinkle more white sugar on top. Bake for 8-10 minutes. Cool the cookies on the cookie sheet for about 3 minutes and then move to a wire rack to finish cooling. Serve while still warm.

Store cookies in an airtight container at room temperature. They will stay fresh for about a week.

3 Comments »

A Beginning. With Brownies.

So here we are. The summer of 2012. I’ve finally done what I’ve been saying I’ve been going to do for awhile: starting a food blog. But there’s so many food blogs on the internet that I am determined to make this one different.

I want this to be a blog about how food brings people together and how no matter how far you are from where you call home or who you call your family, food can always take you back there.

There will be recipes here. There will be stories here. There will be lots of emotions here (just can’t help it sometimes). There will successes and failures here. But mostly there will be food and happiness.

Let’s start with brownies. A very good place to start.

Allow me to introduce you to two of my favorite foods: chocolate and peanut butter. These are probably your old friends too, but put these two ingredients together in these brownies, and you will be in heaven. Or at least, pretty dang close. These are an old family recipe from my Great Aunt Cathy. She’s legit Dutch, and anything that comes from the Dutch has to be good, right? Right. (that’s the excuse I always use anyway…) We call them Batter Up Brownies, and to be perfectly honest, when I was younger these are what I considered brownies. Not chocolate brownies. I know, I know. A travesty. But seriously, make these and you will understand. I promise.

This is a normal recipe. It starts with flour, baking powder, and salt. Combine that with canola oil, eggs, sugar, peanut butter, and vanilla.

Before chocolate chips.

All those things are good, but then you add chocolate. Now I understand the different kinds of chocolate like semi-sweet, bittersweet, and the fancy ones that say 70% coco or something like that. These brownies need plain old milk chocolate though. The point of these is not to be fancy, its to be delicious and carefree. Don’t go too crazy here.

After chocolate chips. So good, friends.

Bake these delicious friends up and consume. Warning: these do not last long! My brothers and I can eat a pan in about a day and a half. My roommates and I have a good 3/4 of this pan gone and it hasn’t even been a day yet. Just be aware. I probably shouldn’t tell you this, but this batter is ridiculously delicious. Don’t be afraid to lick the beaters or spatula or bowl. You have total permission.

Perfect with a glass of milk. Seriously. Perfect.

Batter Up Brownies

Makes 1 9×13 pan

Ingredients:

1 cup flour

1/2 teaspoon baking powder

1/2 teaspoon salt

1/2 cup canola oil

3 large eggs

1 and 1/2 cups sugar

1/2 cup peanut smooth peanut butter

1 teaspoon vanilla

1 cup (give or take a 1/4 cup) milk chocolate chips

Preheat oven to 350 degrees and grease a 9×13 pan with oil/cooking spray

Measure flour, baking powder, and salt and combine in a small bowl. In the bowl of a stand mixture with the paddle attachment or in a bowl with an electric hand mixer combine oil, eggs, and sugar until well mixed, or about 2 minutes. Add dry mixture to the wet mixture and mix until combined, scraping down the sides of the bowl as necessary. Add the vanilla and peanut butter and mix. Stir in the chocolate chips. Pour into greased pan and bake for 25-35 minutes or until the top is golden brown and the brownies are set. Cool in the pan and consume quickly. With milk.

These brownies will last, in an airtight container, for about a week. But they probably won’t last that long. Just saying.

2 Comments »

CreativeWhimsy

A blog about one person's creative attempts

"Give a girl an education..."

The random musings of a traveler turned grad student.

Katina's Adventures Abroad

Follow my journey in Oxford, England.

The Ramblings of a Knitting Goddess

I knit. I laugh. I dream.

CaptainAwkward.com

Don't need to be cool to be kind.

Learning to Speak

An Expression of Faith

Inside the PH

Learning to Live Inside the Pastor's House

Peace, Love & Fashion

I am Anne & I Blog Fashion

Sweet And Crumby

Baking, a Love Story